Have you made your mind to start your blogging career? If yes, there’s no better option than the Blogger to get started with a Blog for free.
Yep! I’m talking about Google’s Free Blogging Platform AKA Blogspot.
Blogger is the world’s most popular blogging platform after WordPress.org. Yet, free wordpress.com has some limitations that I don’t like.
And that is the reason I recommend Blogger instead of WordPress. (Only If you can’t pay for web hosting yet).
No doubt that WordPress is far better than Blogger on many things. Such as SEO Friendly Elegant Designs, Features, and the Back-end Interface.
But still, you need to pay for WordPress if you don’t want to get stuck because of their limitations.
Now you want to compare them right?
If so, I recommend you to read one of my favorite blog writer – Harsh Agarwal‘s article here.
Or let’s continue…
In this article, I will only show you the steps to create your first blog. And some useful tips to grow your career as a blogger. But, I have a lot of useful tips and tutorials coming for you in the future.
If you don’t want to miss any of them, don’t forget to subscribe to my newsletter here.
Now let’s move on to the topic.
To create a blog on blogger, you need a Google Account to Sign in to the Blogger. If you don’t have one, you can create it here or you can also create it through blogger.
If you need any help in creating your Google Account, read this article from WikiHow.
Let’s Take A Look At Steps
Step 1: After setting up your Google Account, go to https://www.blogger.com. The new interface of this website looks like this:

Now Click on any of the links, as shown above in the picture (i.e., “Sign In” or “Create Your Blog“).
Step 2: Now you have to Login using your Google Account, i.e., your Gmail ID and Password. If you are already signed in to your Google Account, You’ll see the screen as shown below:
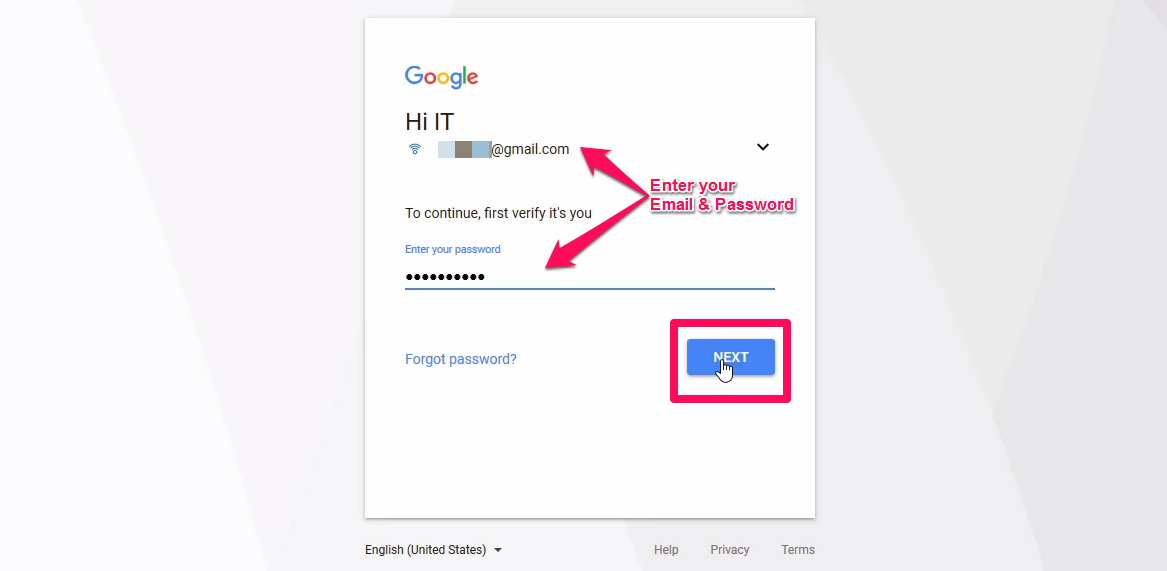
Now, Click on the “NEXT” button to complete your sign in process and proceed to the next step.
Step 3: Now you have to Confirm your Profile Page on this screen.
By default, it will select your Google+ Profile if you already have it. Otherwise, it may prompt you to create one. Here’s how this screen looks like:
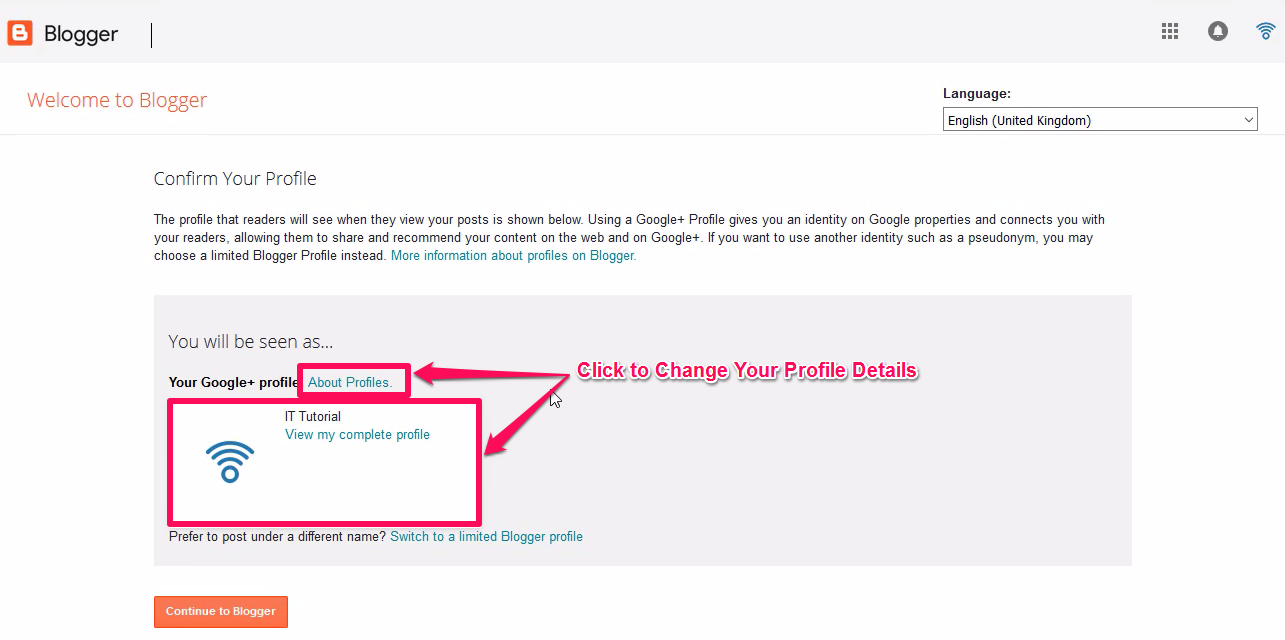
The profile selection here will be your author details for your blog posts. So, make sure it looks as good as possible.
If you don’t want to create a Google+ Profile, You also have a choice to switch to the limited Blogger Profile. To do that, you can click on the “Switch to a limited Blogger profile” link as shown below:

But wait, I don’t recommend you to do that. There are several reasons behind it. The Blogger profile is old and limited as mentioned in the link. Whereas, Google+ Profile gives you a lot of extra benefits.
Your readers can follow you using that Google+ Profile. You can keep them updated like you do on Facebook and Twitter. But these benefits are not available with the limited Blogger Profile.
You got it, right?
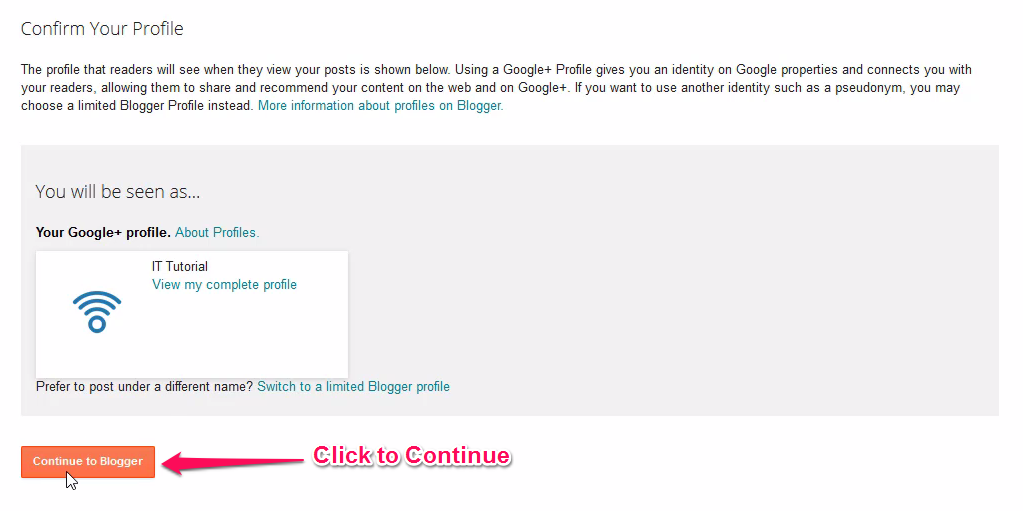
So let the Google+ Profile be your Blogger Profile and click on the “Continue to Blogger” as shown below:
Step 4: Now your Blogger Profile is ready and you can step forward to create your first blog. Here’s how the screen will look like now:
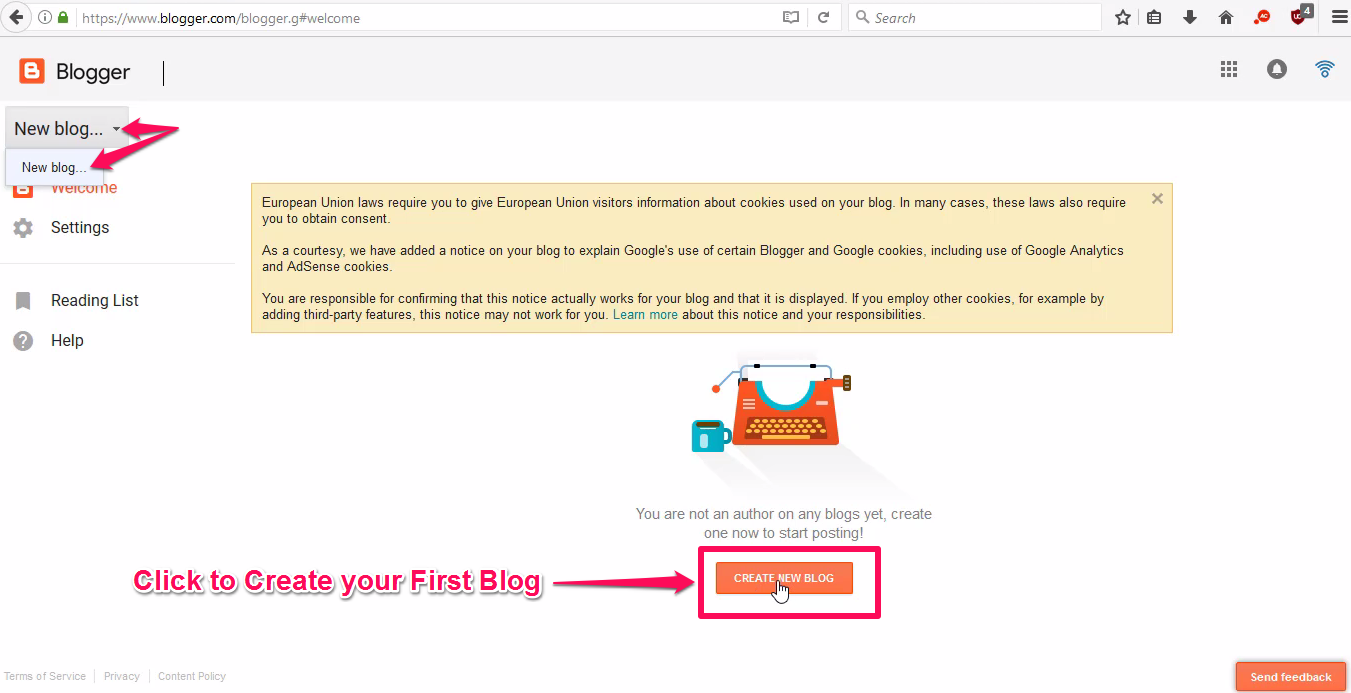
Step 5: Now you’ll land up on the main Blogger Dashboard. But wait! Your blog is not ready yet.
You still have some more steps left. Let’s continue…
In this step you have to click on the “New Blog” or “Create New Blog” option as shown below:

Choosing The Name And Address Of Your Blog
Step 6: Now you have to Choose a Title or Name of your Blog and the Blog Address as well. Make the name as memorable as possible and good.
'If you want to grow big, think it like a brand.' - Bishnu Mahali
I may write about choosing a good brand or blog name later. But for now, you can read How to Choose your Blog Name from WikiHow. OR read from one of my favorite blogger, Harsh Agarwal’s – “How to Decide Name of Your Blog?”
After deciding the name of your blog, head over to the screen and type in your Blog Name on the Title box (See no. 1 in the screenshot below).
Next, type the blog address that you want in the address field (See no. 2). This must be unique – otherwise, you’ll get an error (See no. 3).
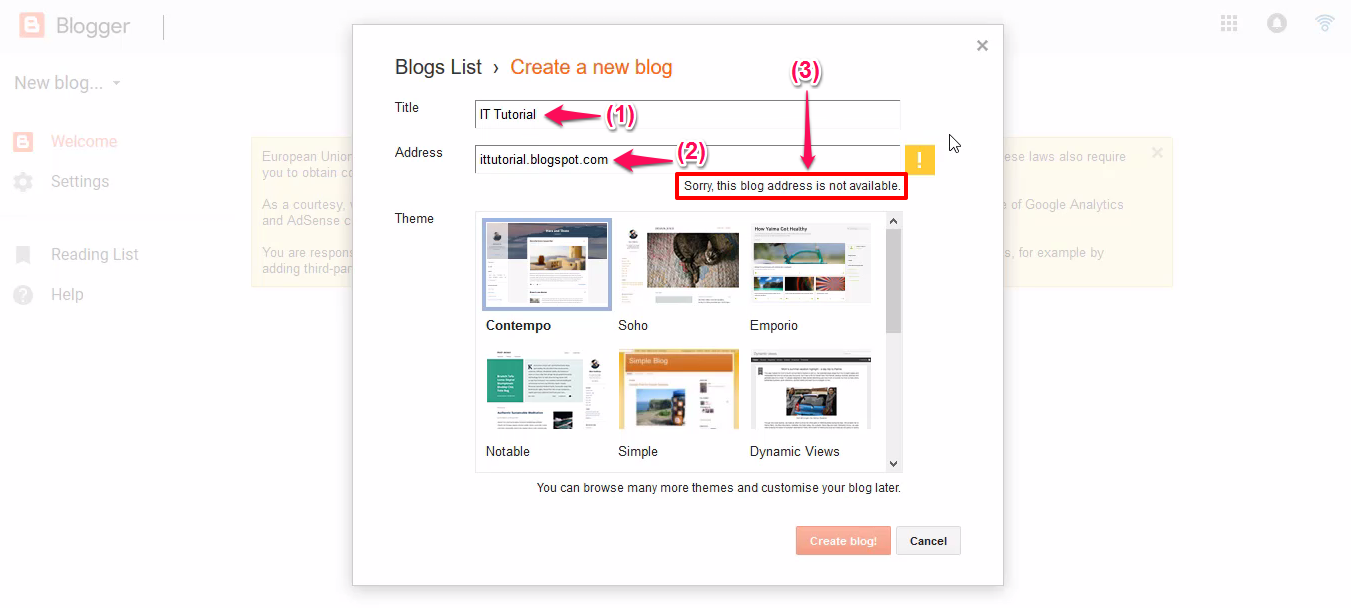
If the error occurs, the Create Blog button will remain disabled. So, try out different names every time and you’ll get it done.
If the blog address will be available. You’ll see a blue tick mark on the right side of the address field as shown in the screenshot below.
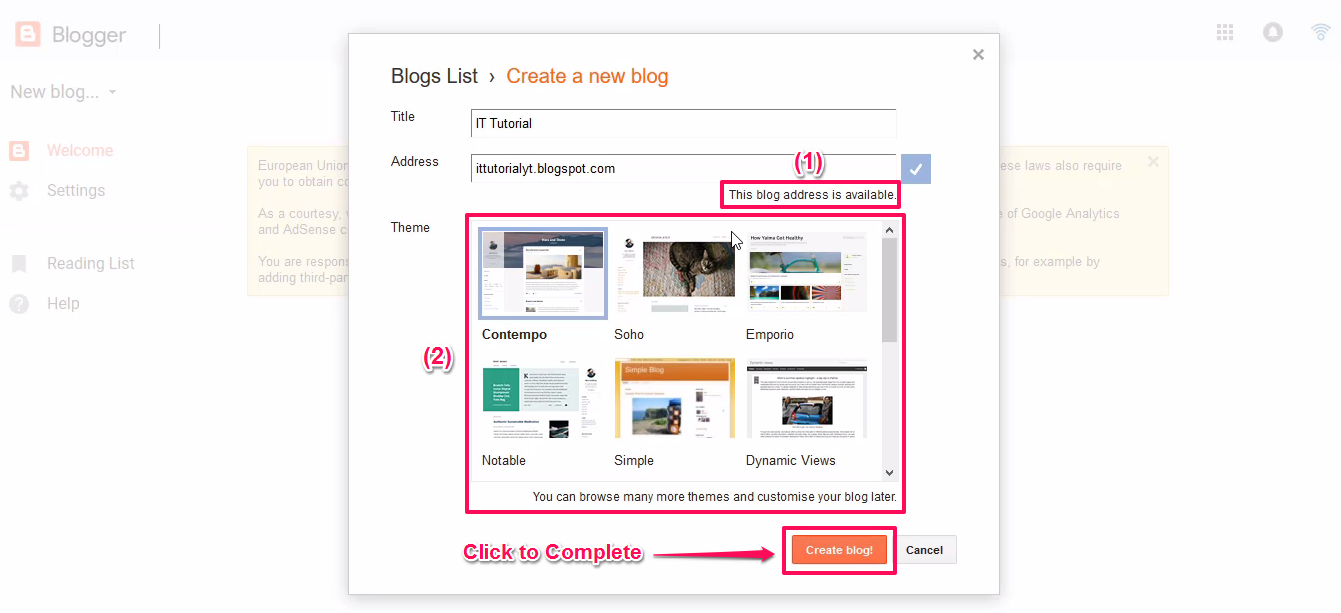
If this is the case, you’re good to go. Next, select a theme for your blog from the choices given in the box no. 2 as shown in the screenshot.
And, click on “Create Blog!”
Ta-da! Congratulations, Your Blog is ready!
Here’s how the screen will look like now:
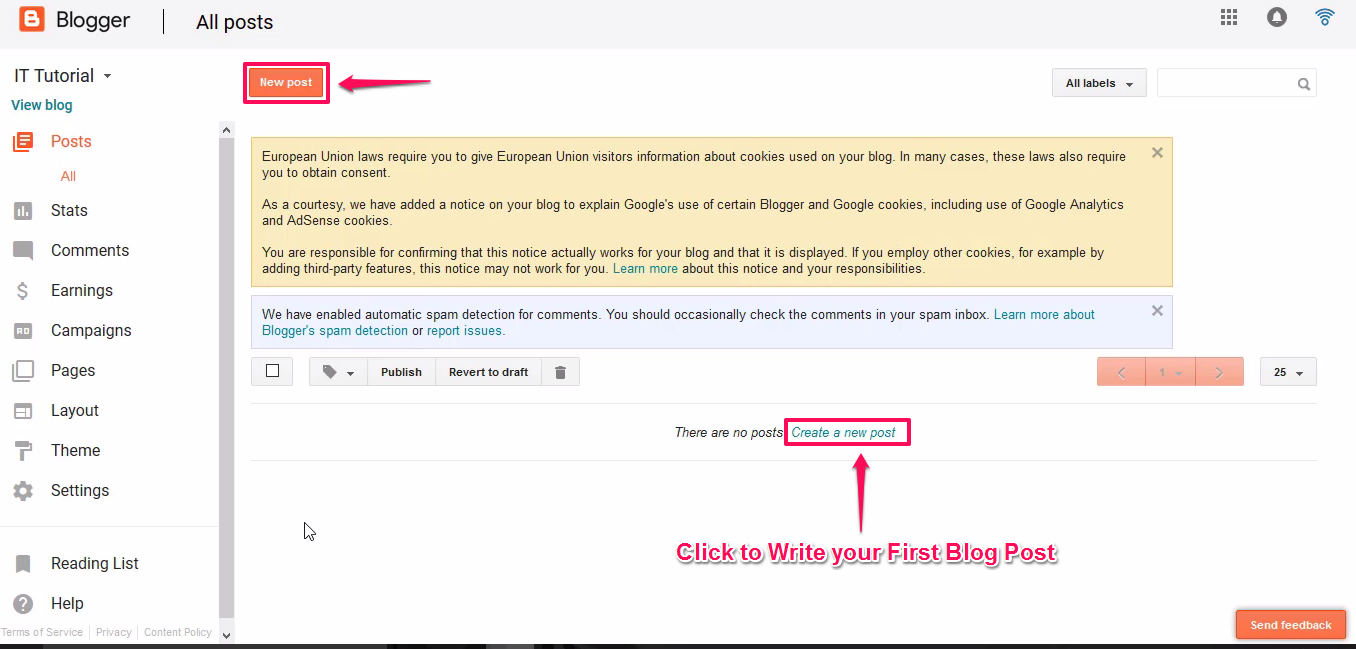
You can click on the “New post” or “Create a new post” to start writing your first blog post.
In future articles, we’ll learn many things about the blogger. Such as customizing themes, getting or parking a premium domain, etc. etc.
So, if you don’t wanna miss them, don’t forget to subscribe to the My Blogging Newsletter.
For now, you can read my “How to get extra traffic using your old blog posts?” article here.
And hey! If you don’t like reading but understand Hindi. Then you can follow my YouTube Channel for the video tutorials on Blogging and much more.
Here’s the first video of the blogging series:
If you still have any questions, suggestions or feedback – let me know in the comment section below. I’ll be happy to get in touch with you.
Till then, Take care of yourself and Happy Blogging!


I found something new and unique information, feeling good to know something new from you thanks for such great information. Great appreciation for your work, Hope for a new update soon.