Want to create donation forms for non-profits? In this post, I’m going to show you how to do it easily and do it in a better way.
In 2020, I received a lot of requests to create online donation forms due to the Covid-19 pandemic situation which is still going on.
And now I've decided to share how to do it with everyone.
The best part is, I've found the easiest way to do it so that anyone can do it.
We’ll be doing it with a drag-and-drop WordPress form builder and its add-ons. Don’t worry, you can get started for free.
I’m assuming you already have a WordPress website. If not, I highly recommend you to start your blog or WordPress website with either Dreamhost or GreenGeeks.
You can also go with Bluehost if it fits your needs and requirements.
Now let’s get going with our topic.
Why Create Online Donation Forms?
There are a dozen of reasons why you should create your online donation forms but I’m going to mention some of the reasons here.
In fact, I would argue that online donation forms simply a better option.
Now let’s look at some of the benefits of creating an online donation form:
- Online Donation Forms Makes It Easier To Give
- Donations Are Easier To Transfer
- Everything Can Be Automated
- It Is Easier To Setup
- It Will Help You To Reach To A Larger Audience Easily
- And much more…
Now it’s time we look at how to create these online donation forms.
How To Create Online Donation Forms?
The prerequisite would be a WordPress website, WPForms, and an account with any of the supported payment gateways or processors like PayPal, Stripe, , etc.
STEP 1: Create A WordPress Website
If you don’t have a website yet, then go ahead and create it with Dreamhost now. It would take about 5-15 minutes maximum. Don’t worry, it’s as easy as creating an email account.
You’ll be guided with the on-screen instructions as well.
When your website is up and running. We’ll install and activate WPForms on your website.
STEP 2: Install & Activate WPForms
First of all, get your WPForms license from here and then download the plugin file.
Now go to your WordPress dashboard and install and activate the plugin.
Also, make sure to verify your license key to get started.
STEP 3: Create Your Donation Form
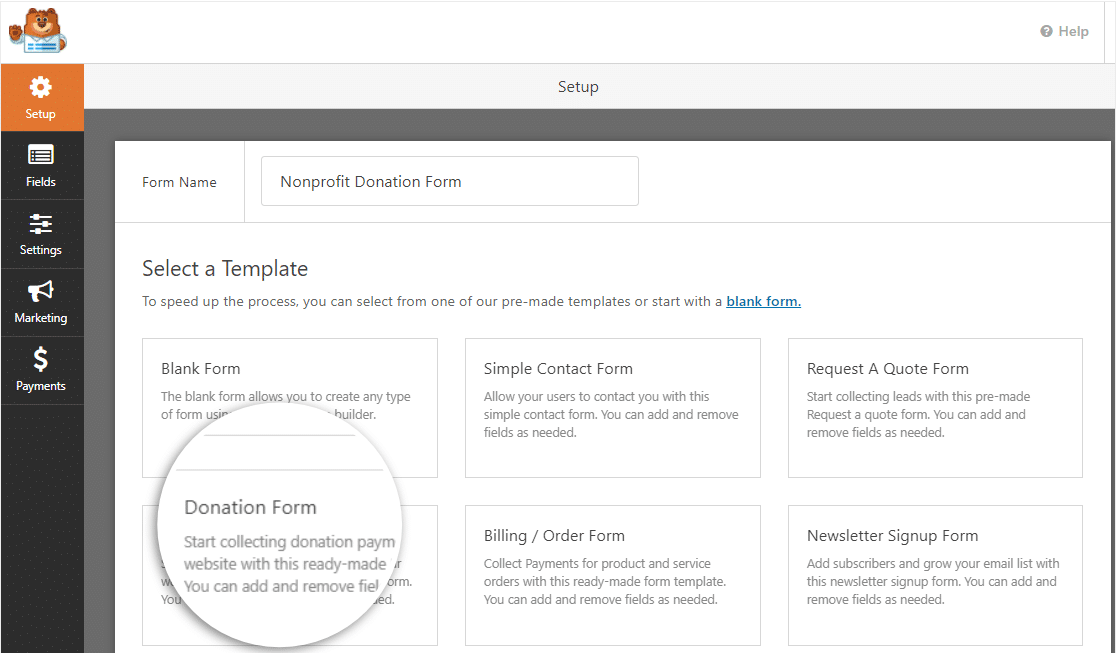
Once it’s ready to use, go to WPForms » Add New to create a new form.
You’ll see a lot of pre-built form templates on this screen. You can either choose one of the templates or start from scratch using the blank template.
And guess what? There’s a template already created for your Donation Form.
And what makes it more interesting is that, it is completely customizable so that you don’t have to compromise by using someone else's design.
But it will definitely give you a good start.
I highly recommend you to start with the provided template. Just type a name for your form to identify it later and then choose the donation form template.
The form builder will generate the pre-built form for you as shown below:
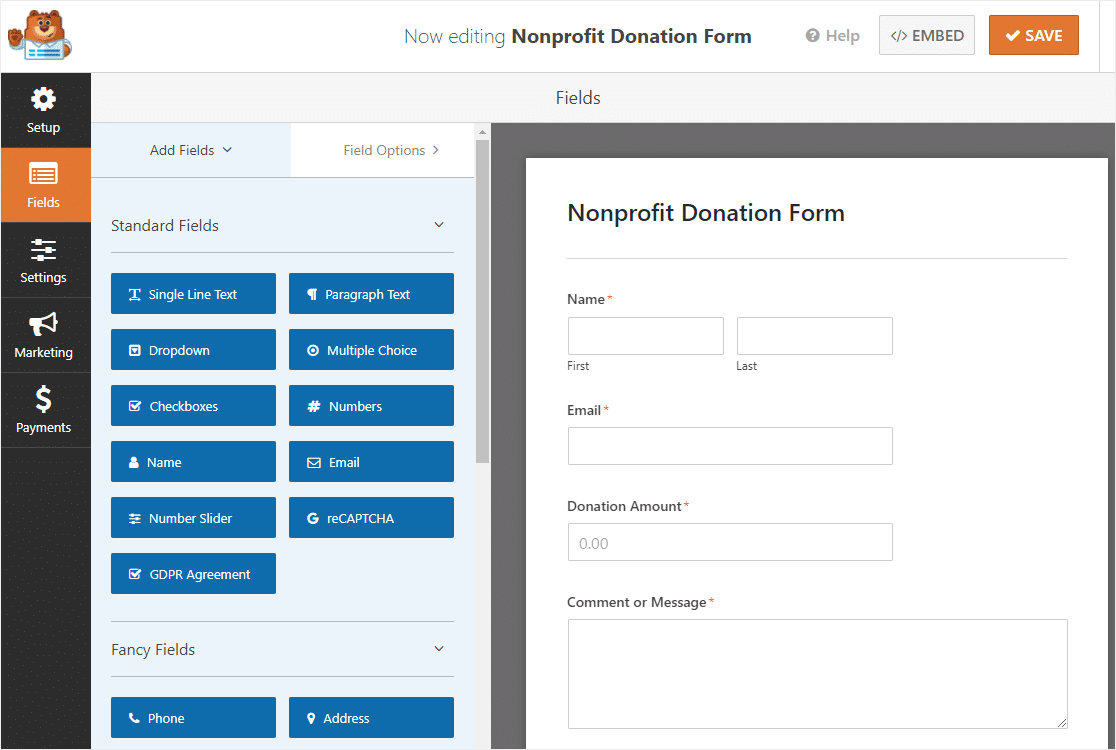
STEP 4: Customize Your Donation Form
As I said earlier, the form built with WPForms is completely customizable and you can do whatever you like with its easy-to-use interface and drag and drop form builder.
So, customize your donation form as you like and then move on to the next step.
If you don’t know how to use WPForms builder, there are lots of tutorials on YouTube that you can watch anytime.
Once you’re happy with the form fields that you need, don’t forget to change the settings for your form.
To do that, go to the Settings tab and you’ll see a lot of options there that you can change or customize.
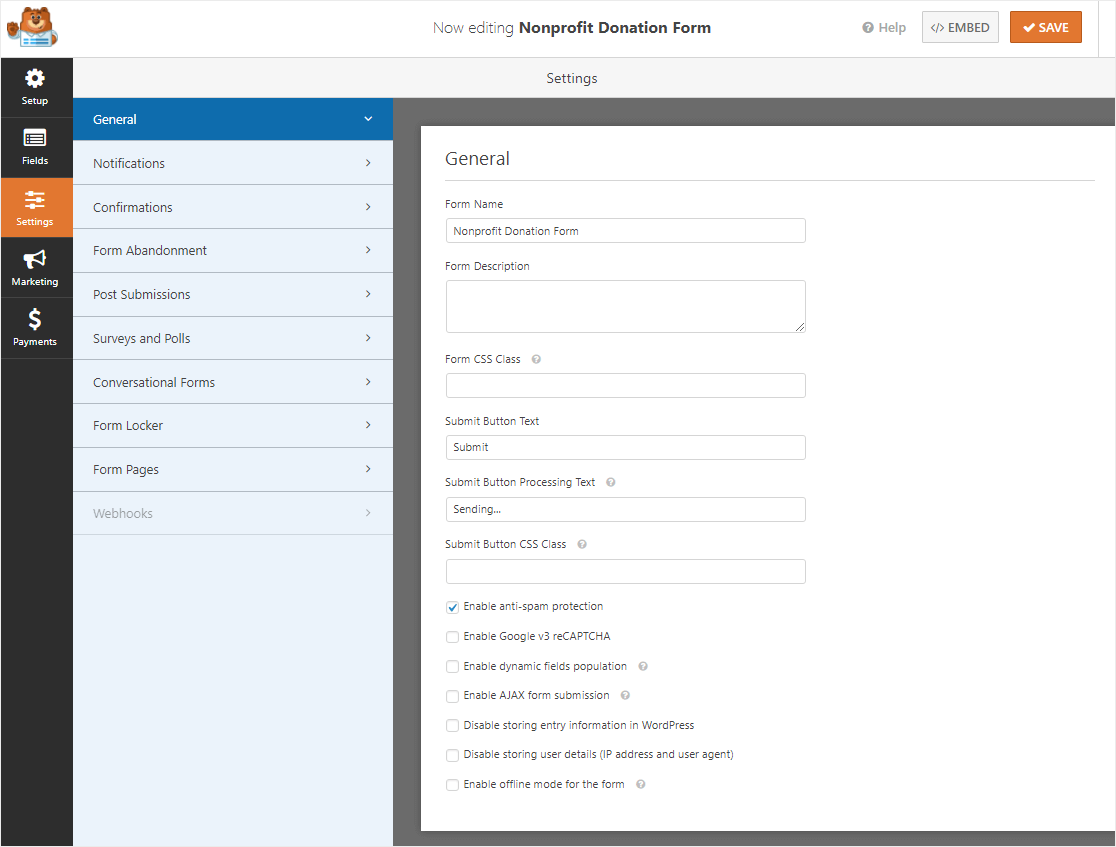
You can even customize the notifications, confirmation settings, etc.
STEP 5: Setup A Payment Gateway/Processor
Next, you have to set up a payment processor or gateway to receive payments from the donators.
WPForms supports multiple payment options like PayPal, Stripe, Authorize.Net, etc.
To configure a payment system for your donation form, go to the Payments option from your form builder and then select the payment gateway that you would like to enable.
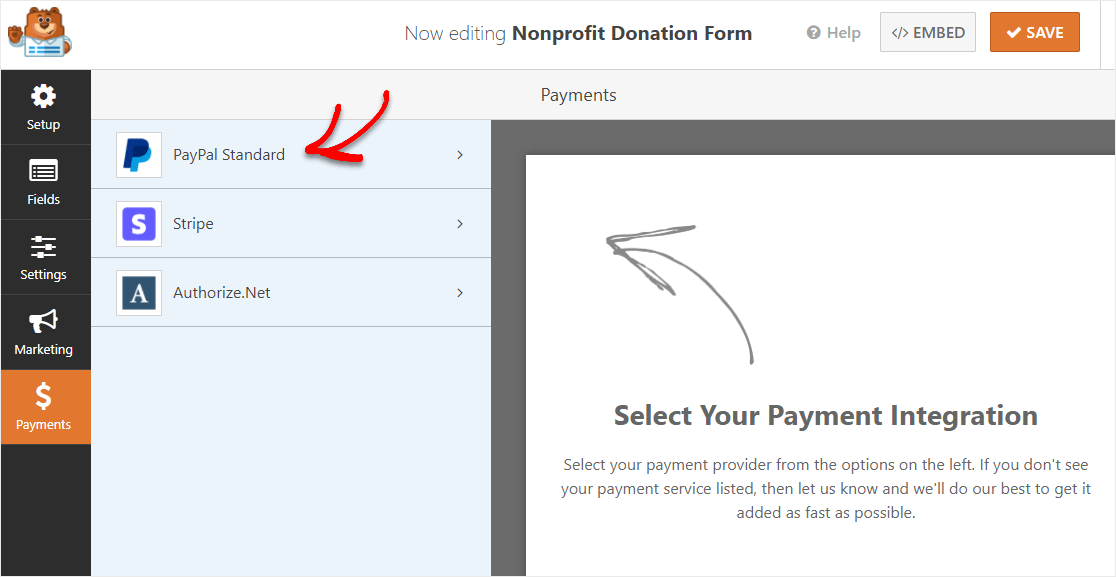
Follow the on-screen instructions to complete the setup process.
Once everything is done on the form builder, make sure to save the form and move on to the next step.
STEP 6: Add The Form To Your Website/Donation Page
This is the easiest way part of course. WPForms is Gutenberg ready, which means you can find it in the Gutenberg blocks which is now the default WordPress editor.
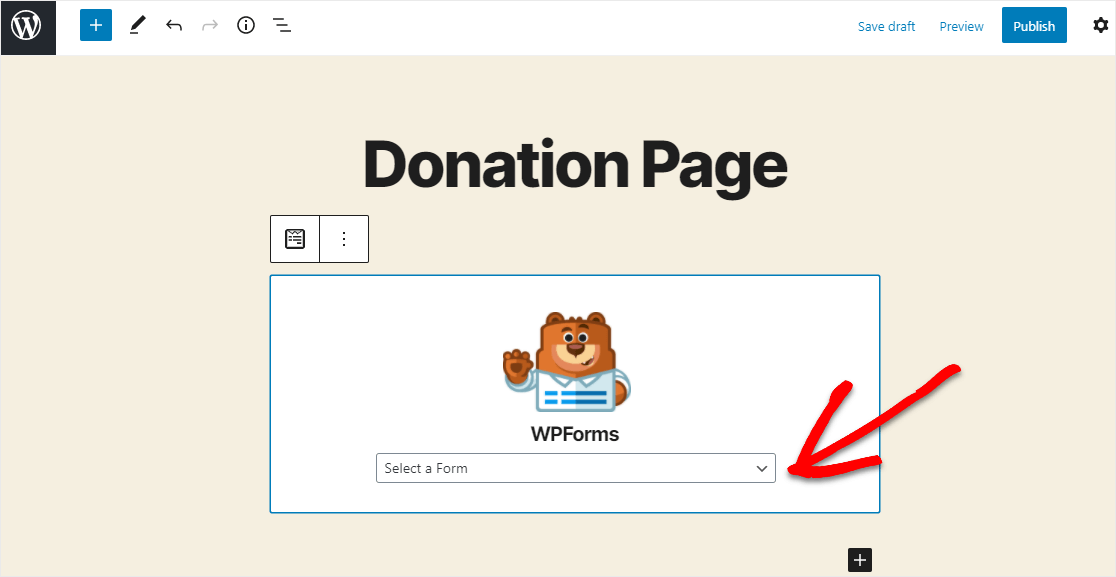
Just select the form that you want to display and publish your page to see it live in action.
If you want to add it to the sidebar, you can do that as well using the WPForms widget.
And last but not the least, you can even use the shortcodes if that is something you need.
So that’s it. Your online donation form for the non-profit is live and kicking. Good luck with all the collections.
Conclusion
After the Covid-19 pandemic started, I received a lot of requests to create online donation forms from my clients and freelance profile.
Although I made it live for all of them, I also felt that I should share how easy it is to create it with the right tools like WPForms.
I wanted everyone to be able to do it without asking anyone or having to wait for it.
So I shared this article today which shows you the easiest way to create online donation forms and in the best way possible.
I hope you like it. See you again!
Try it for FREE
It's free to download. Go ahead and test it yourself.