Do you want to grow your email list whenever a form is submitted from your WordPress website?
You can do it easily with the help of WPForms and ActiveCampaign.
WPForms offers built-in seamless integration with ActiveCampaign to sync the data from WPForms to your ActiveCampaign account.
In this post, I will show you how you can easily connect WPForms and ActiveCampaign to automate the process.
Why Should You Integrate WPForms And ActiveCampaign?
WPForms lets you integrate the leading email marketing service provider ActiveCampaign so you can automate the email list building process.
And of course, create marketing automations without any hassle.
Although there are several reasons why someone would do it, here are some of the benefits of integrating ActiveCampaign with WPForms:
- Create amazing forms with the easy-to-use drag and drop form builder within your WordPress Dashboard.
- Integrate WPForms and ActiveCampaign once and create unlimited forms.
- Add a subscription checkbox below your contact form to add them as email subscribers. Or any other form really!
- Collect interested leads with the form abandonment feature.
- Respond to leads quickly with instant notifications.
- and much more...
Now let's take a look at how to integrate ActiveCampaign with WPForms.
By the way, if you want to learn more about WPForms then read my details review of WPForms here.
Steps To Integrate WPForms With ActiveCampaign
Here is a step-by-step guide to connecting ActiveCampaign with WPForms and creating your first form.
Prerequisite: WPForms installed and activated on your WordPress website.
Step 1: Install The ActiveCampaign Addon
Before activating the ActiveCampaign addon make sure to install and activate the WPForms plugin on your WordPress website.
Once you have finished activating and verified your WPForms license, you will be now able to install ActiveCampaign Addon.
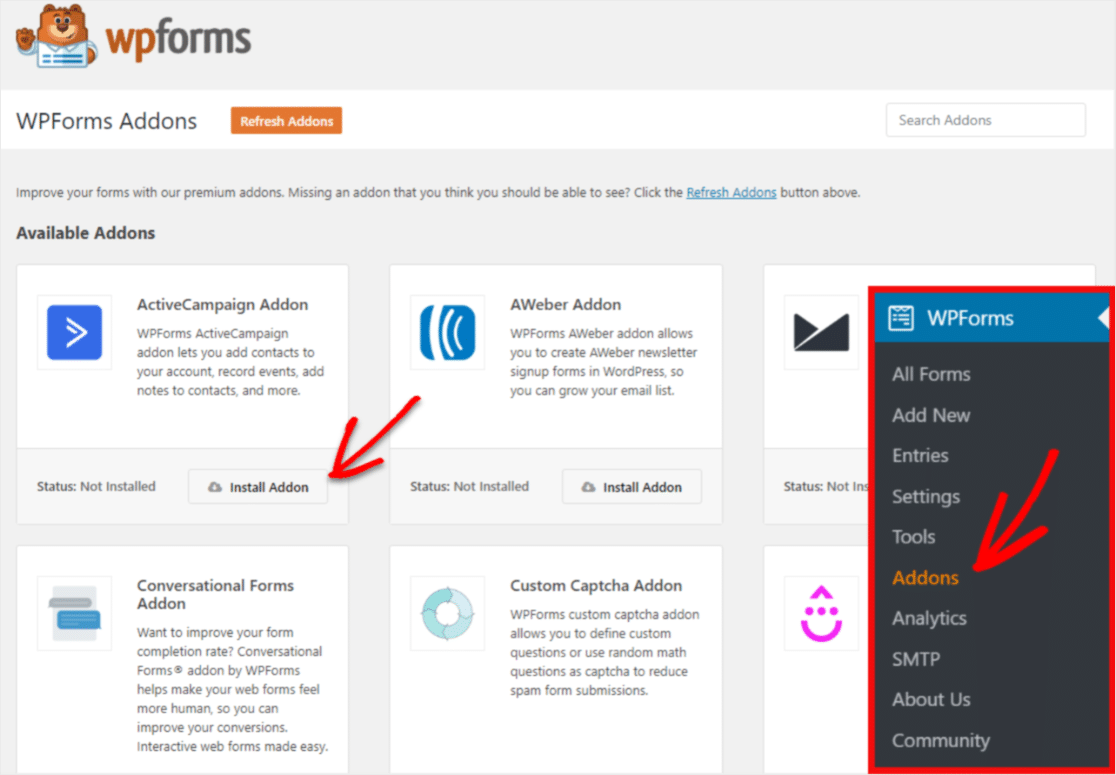
To do this, got to your WordPress dashboard and hover over WPForms → Addons and find ActiveCampaign Addon and click on the Install Addon button.
Step 2: Create Your Form
After the ActiveCampaign Addon installation, it's time to create your first form.
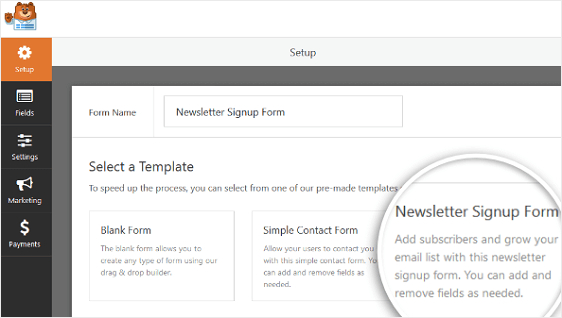
Head over to WPForms → Add New and a new screen will be open where you can give your form a name and select the Newsletter Signup Form template or whatever you're trying to make.
You can easily customize the form with WPForms drag and drop editor.
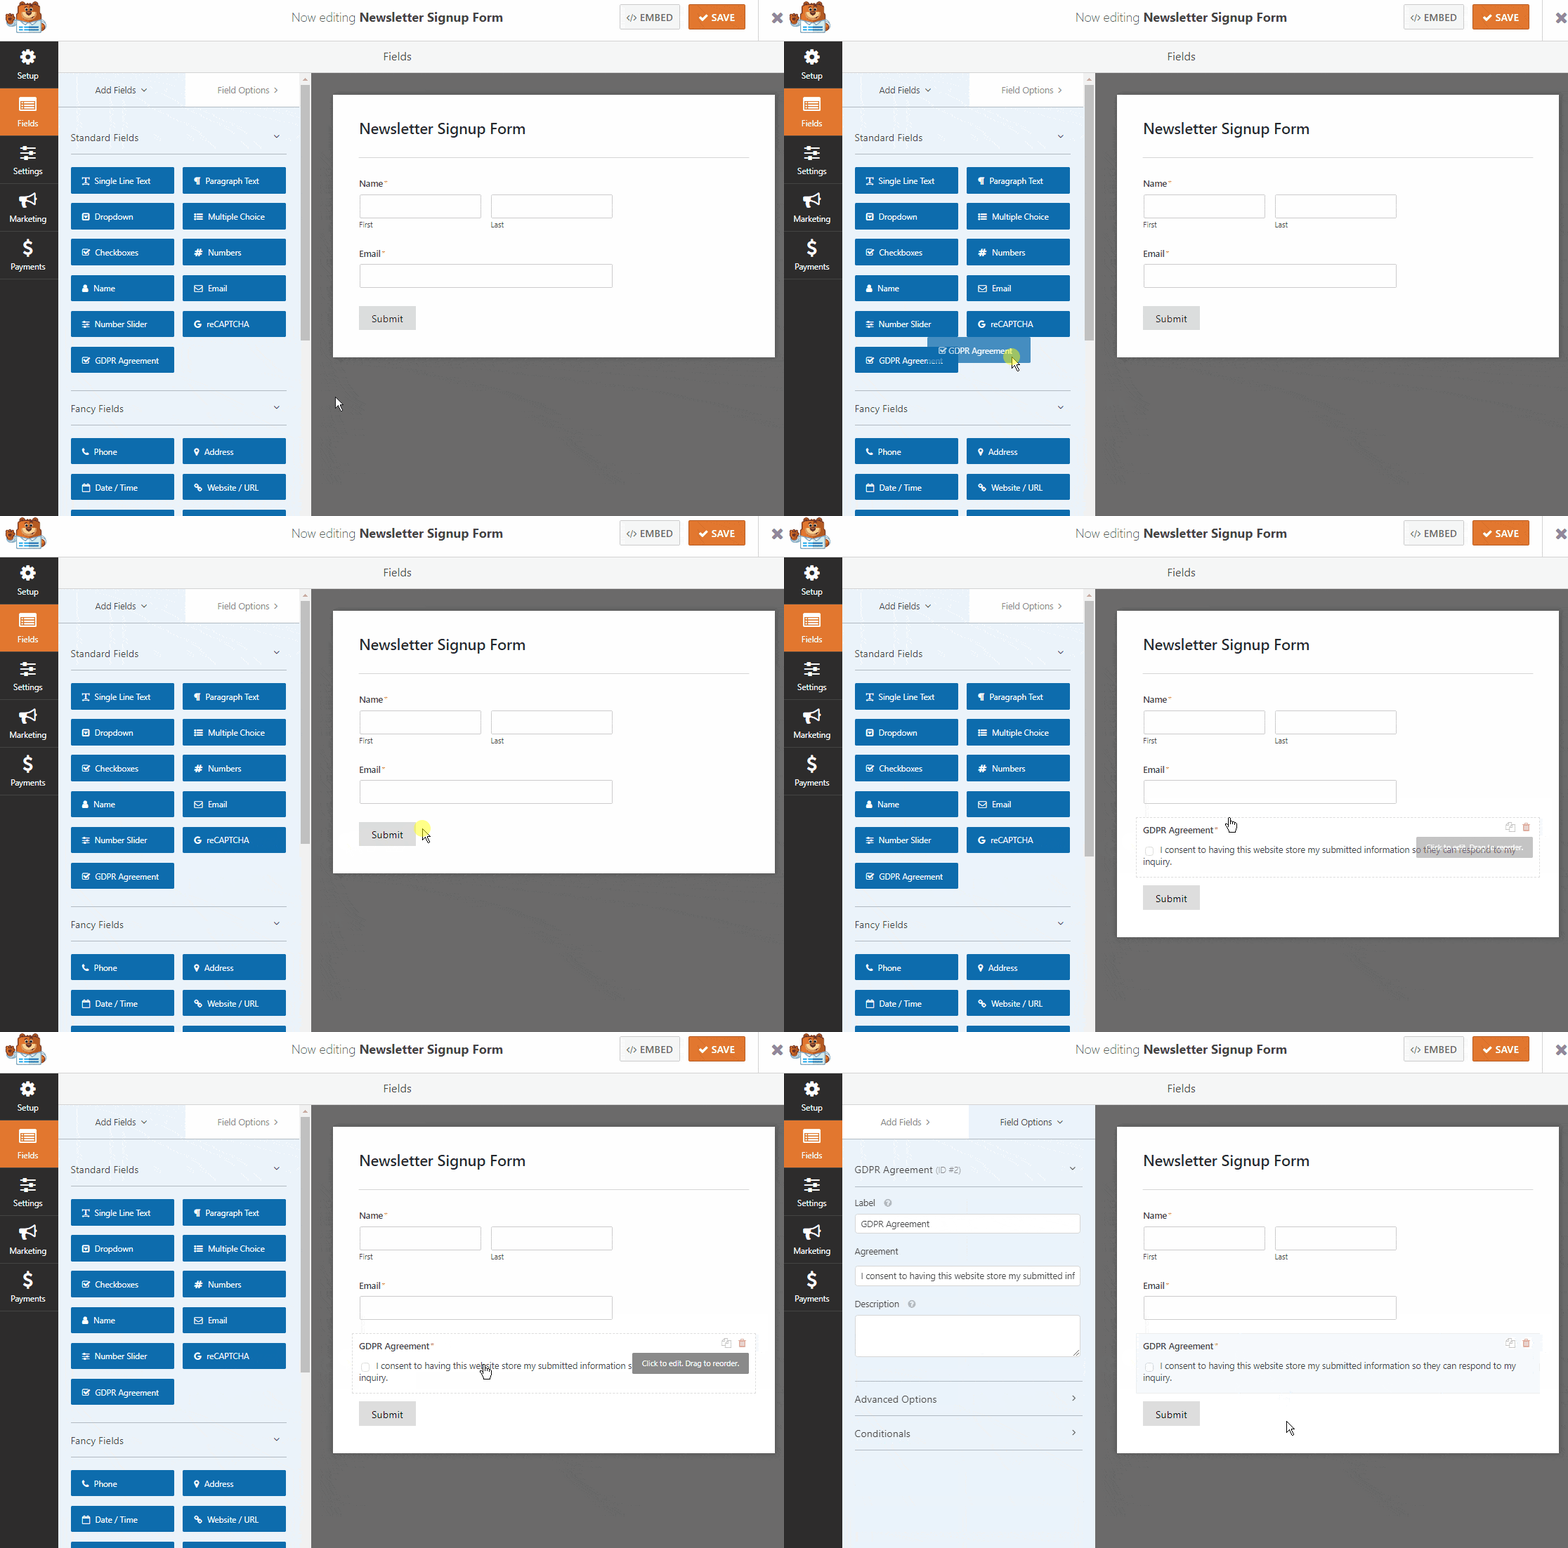
Once you have added all the required fields you have to consider adding the GDPR Agreement field to comply with the GDPR.
If you want to make any changes in the GDPR field then simply click on it.
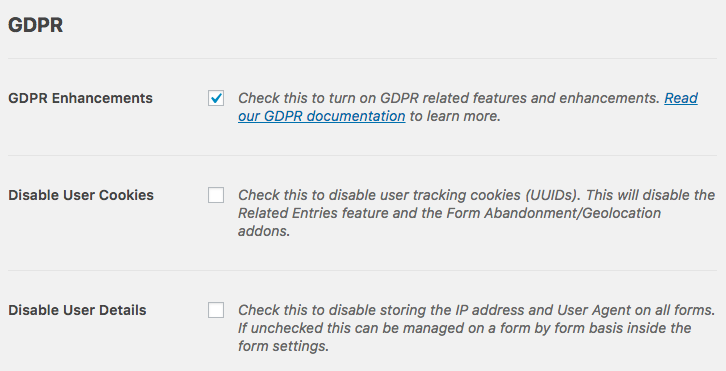
If you want to add the GDPR Agreement field to your subscriber form then go to WPForms → Settings and click on the GDPR Enhancements checkbox.
Once you have finished the form customization then click on the Save button.
Step 3: Integrate The Form With ActiveCampaign
Now you have to connect this form with the ActiveCampaign.
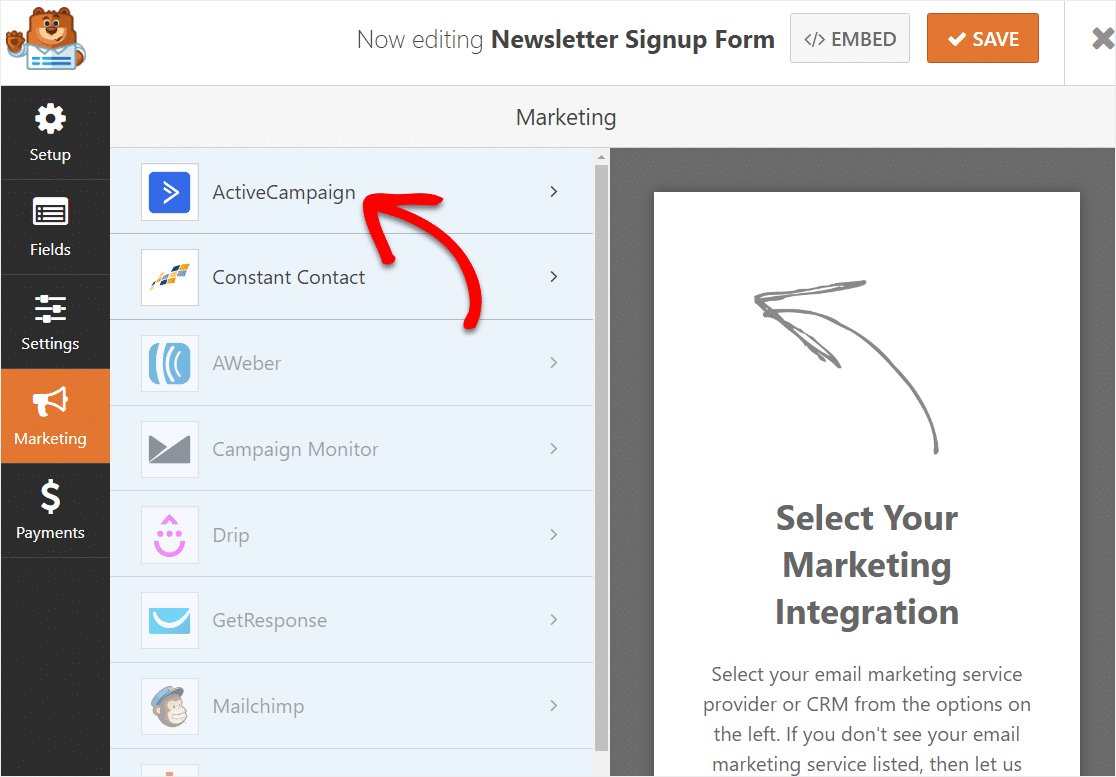
To do this, click on the Marketing tab which is present at the left panel, and click on ActiveCampaign.
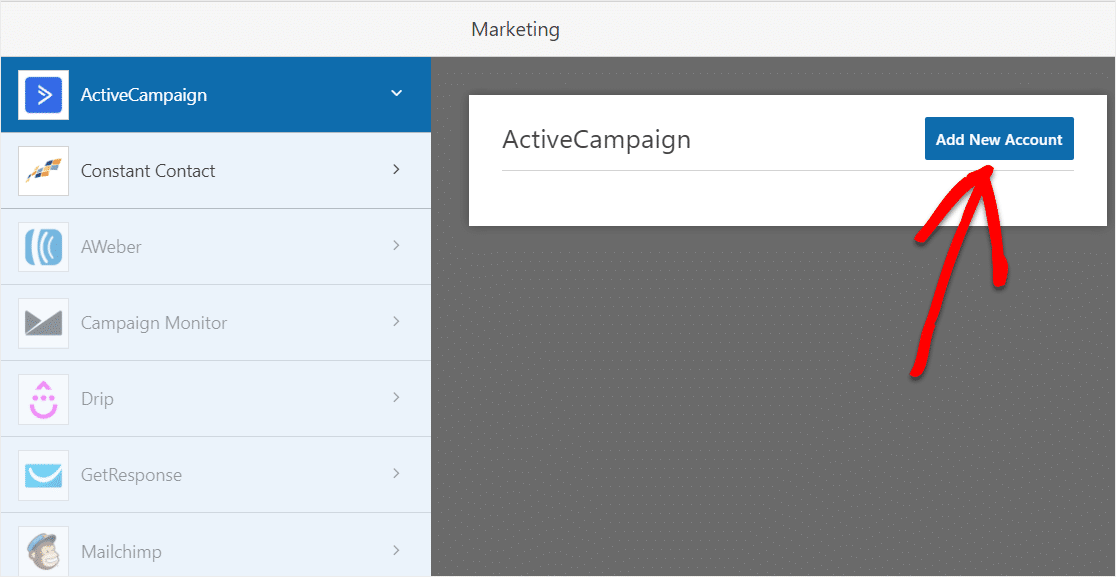
Now you need to click on the Add New Account and a popup will appear where you have to fill in information for your ActiveCampaign account.
Now you need to fill in these details:
- ActiveCampaign Account Name - This is only for your convenience if you add more than one account.
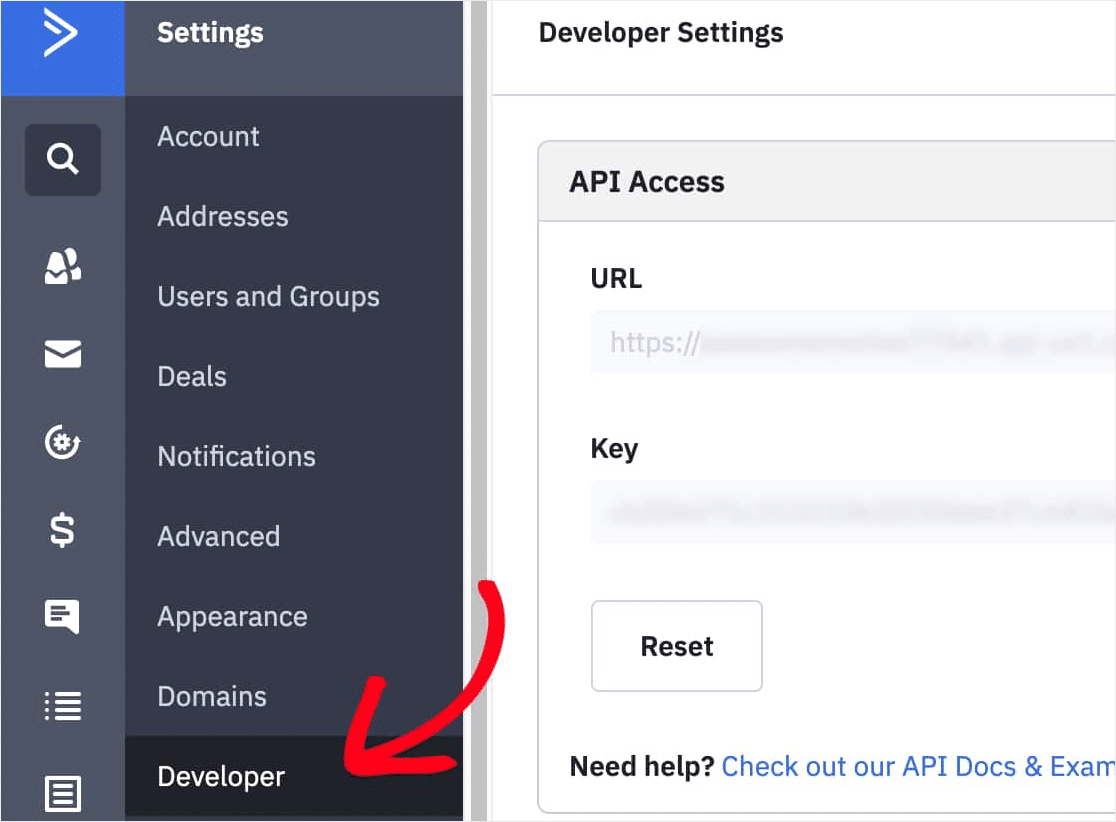
- ActiveCampaign API URL and Key - ActiveCampaign prove unique API to every account.
To find these credentials, login to your ActiveCampaign account and click on the Settings option → Developer and here on this page your API URL and Key will be visible.
- Event Tracking ID and Key - This is optional but if you want to add it then again go to your ActiveCampaign account click on the Settings → Tracking and toggle the Event Tracking status 'ON'.

Now click on the Connect to ActiveCampaign button and after adding all the fields click on ADD button to save.
Step 4: Setting Up Your Form
Now give a nickname for this form and click on Ok. This nickname is only visible to you for your convenience.
Now more settings will appear on your screen.
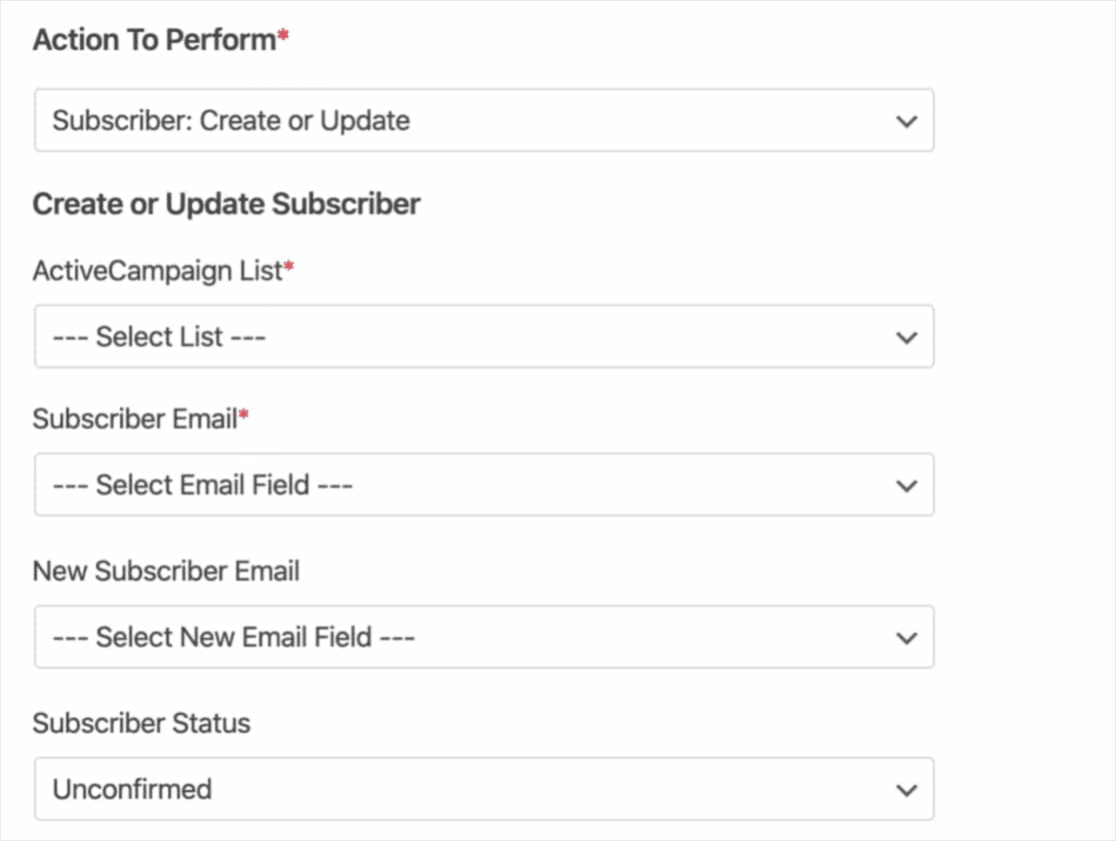
- Select Account - Select any of the ActiveCampaign accounts that you have connected.
- Action to Performs - Select the action that you want when someone fills this form. Click on the Select Action and click on Subscriber: Create or Update, more fields will appear.
- ActiveCampaign List - Select any of your ActiveCampaign List or create one from your account.
- Subscriber Email - Select the email field from your form.
- New Subscriber Email - Use it to update your existing subscriber.
- Subscriber Status - The status of the subscribers will be automatically assigned.
- Tags To Add - Select any tag(s) from your ActiveCampaign account.
- Tags To Delete - Delete any existing tags or any default tags.
- Note - If you want to show a note then type it here.
You have successfully created a form using WPForms that is seamlessly integrated with ActiveCampaign.
Step 5: Add The Form To Your Site
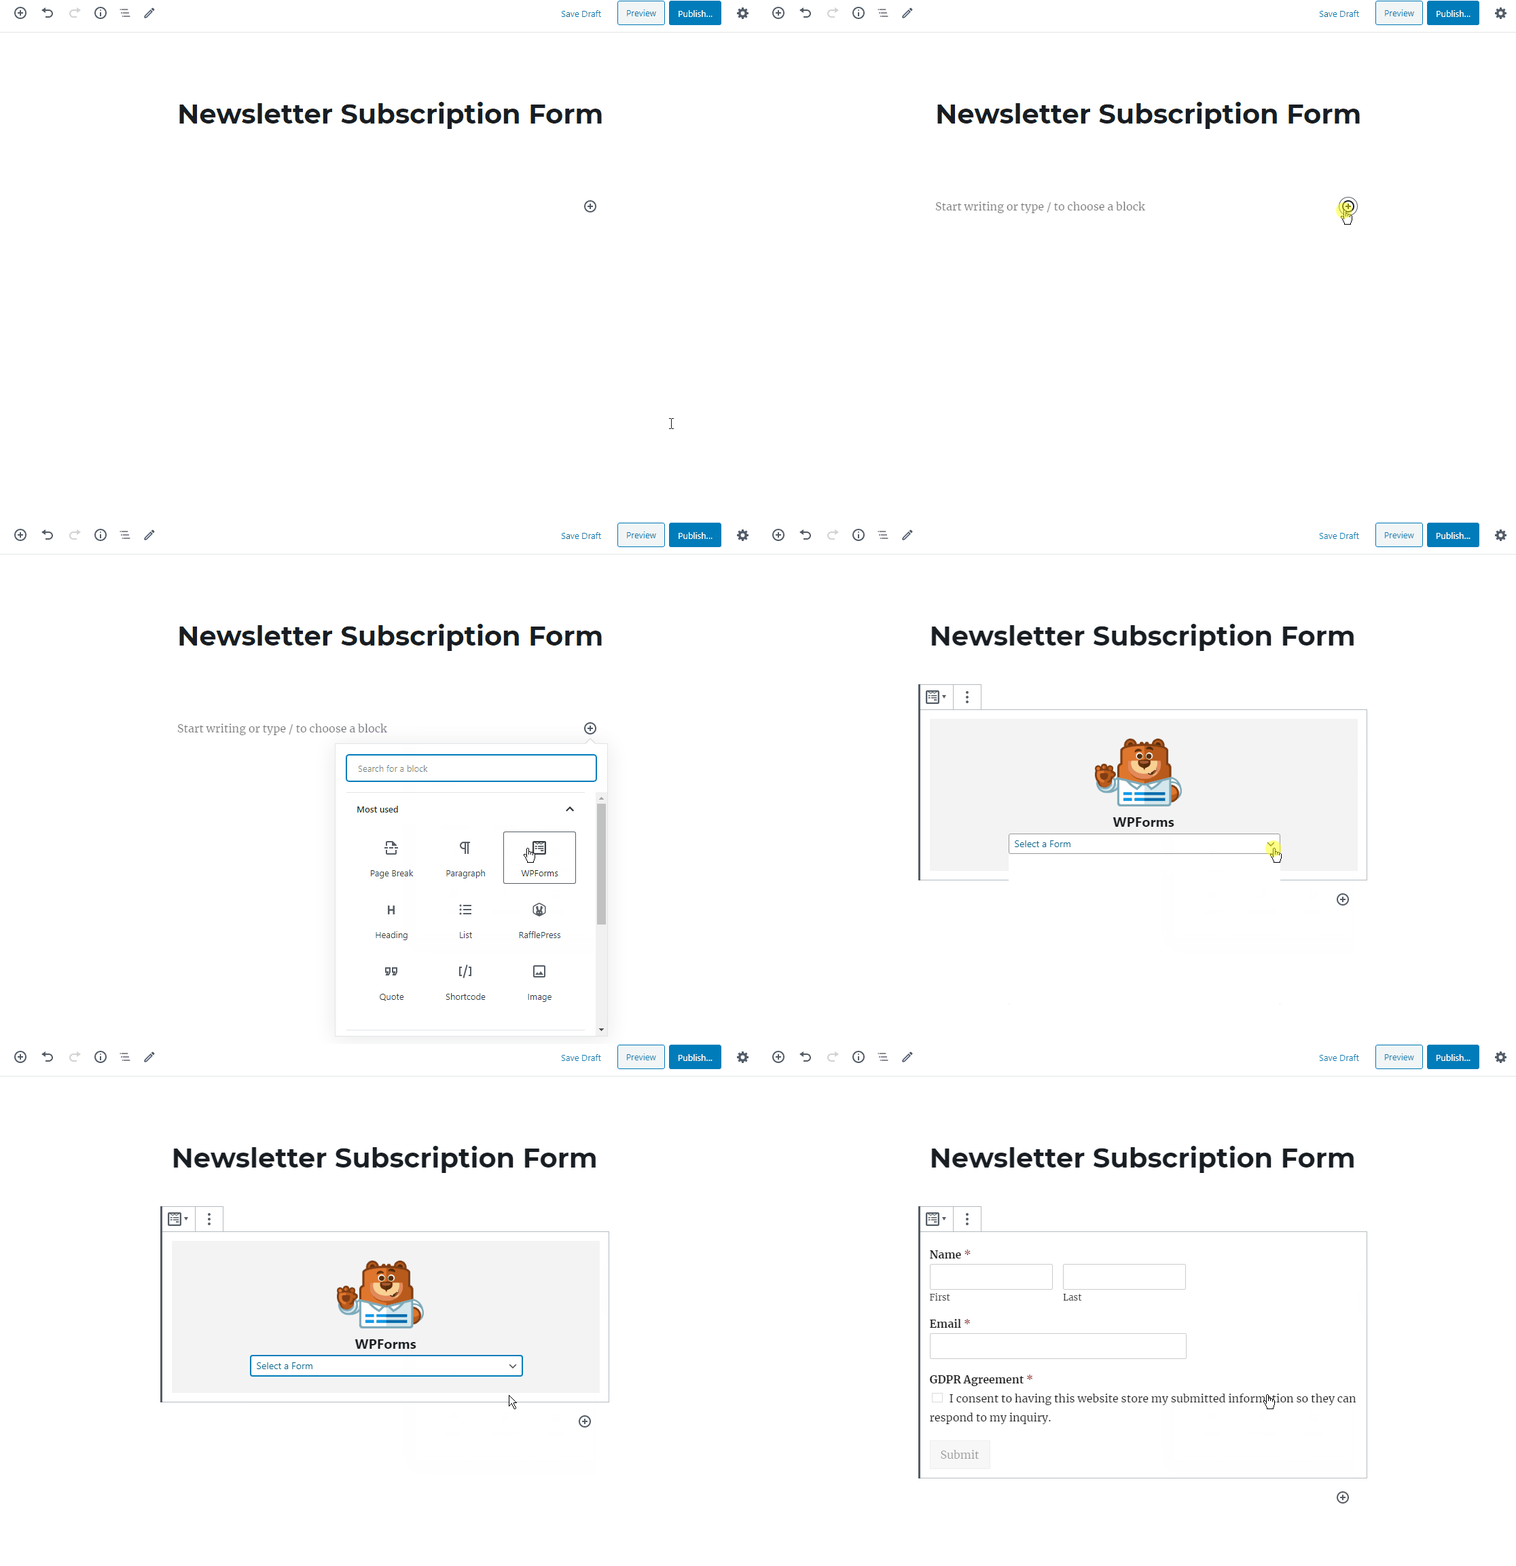
Adding the ActiveCampaign form to your WordPress website is super easy.
To add the form add a new post or page in WordPress and add a WPForms block from the default WordPress block editor.
Now select the form that you want to add here and click on the Publish button to make this page live.
Final Thoughts
ActiveCampaign is a leading email marketing service provider and WPForms is also a popular WordPress form builder.
The integration of these two tools makes your list-building process easier than before while adding some more capabilities to your marketing needs.
I hope this guide helps you to generate more leads and sales. If you haven't been using them together, you should get started now.
Try it for FREE
It's free to download. Go ahead and test it yourself.


